Installing the BSI Launcher
- Select to download or run the appropriate installer for your operating system (Windows or Macintosh).
- For Windows installation:
- After selecting the Windows button, an .exe file will be downloaded.
- Once downloaded, locate the downloaded .exe file and double-click to open it. The installer wizard will open. To install BSI to the recommended location, simply select Next and Install.
- After selecting Finish, locate the BSI icon on your desktop or in the Start menu and double click to launch BSI. After checking for updates, the launcher will open.
- For Mac installation:
- After selecting the Mac button, a .zip file will be downloaded. Downloading this file may take a few minutes.
- Once download is complete, a .dmg file will be accessible in the Downloads folder. Open the .dmg file. It may take a few seconds for the file to open.
- An installation window will open. Drag and drop the BSI icon onto your desktop.
- Once the application has finished installing, click the BSI icon on the desktop.
- If prompted to confirm if you want to open an application downloaded from the internet, select Open.
- The BSI launcher will check for updates and then the launcher will open.
- For Windows installation:
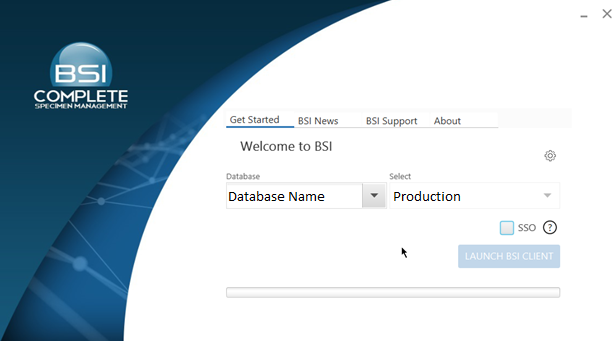
- Type in a database name and then select an instance from the drop-down menu. (If using SSO, please see the section ‘Setting up the BSI Launcher for Single Sign On (SSO) below.) Then select the Launch BSI Client button.
- After downloading, the BSI login dialog will be displayed. The database name keyed in the launcher will be defaulted in the database name.
- Enter your BSI User Name, Password, and Database and select Login to sign into BSI.
- If you need to reset your Mirror or UAT password, please contact BSI Technical Support at bsi@imsweb.com. Selecting the Forgot Password link on the login dialog will not automatically send a randomized password to your e-mail address since these are testing environments.
BSI will require a one-time installation of the BSI launcher, after which users will not need to download and install the BSI launcher again. For future logins, just select the BSI icon on your desktop or from the Start menu.
Setting up the BSI Launcher for Single Sign On (SSO)
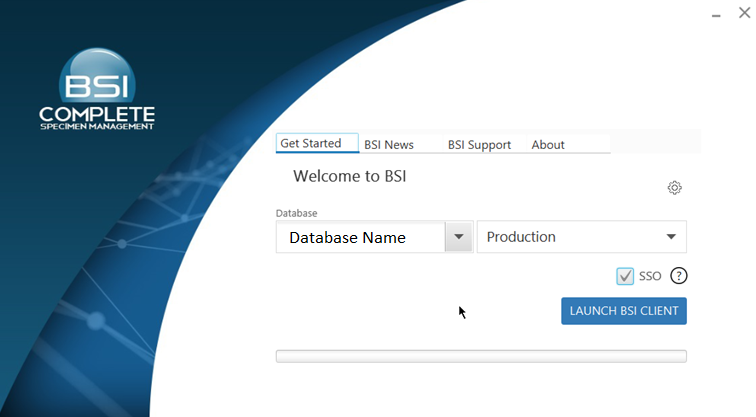
- On the ‘Get Started’ page of the launcher, check the box for SSO. Then type in a Database name and select an Instance from the dropdown.
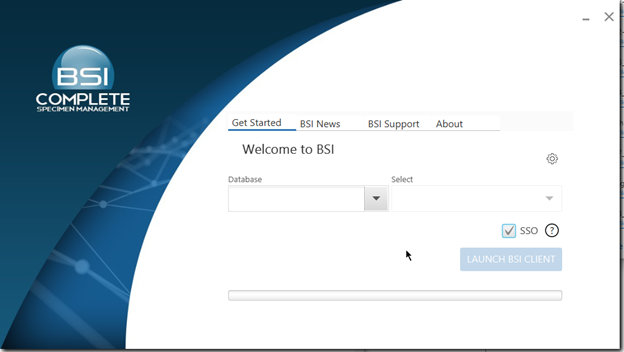
- BSI will remember the selection of the SSO checkbox for future logins.
- Select the Launch BSI Client button.
- After downloading, select the appropriate IdP option. Enter your credentials and select Login. BSI will launch.

To launch the online BSI User's Guide, please click here.